This post may contain affiliate links. Should you make a purchase through one of these links, I may earn a small commission that supports me to keep making new content at no additional cost to you. For more info, please visit the Privacy Policy page.
Pockets make life easier, especially in a bag! This post goes over how to sew a basic and easy pocket that you can add into your projects!

What you will need:
- 100% Cotton Fabric (solid colours) , 100% Cotton Fabric (Cute Prints) – How much you need will depend on the size of your pocket.
- Optional to add structure: light-weight or mid-weight non-woven Iron-on fusible interfacing (I used Pellon 911FF Featherweight)
- Thread
- Tape measure
- Scissors (optionally shears)
- Sewing pins
- Sewing needle or Sewing machine (depending on chosen way to attach lining)
- Pencil
- Iron
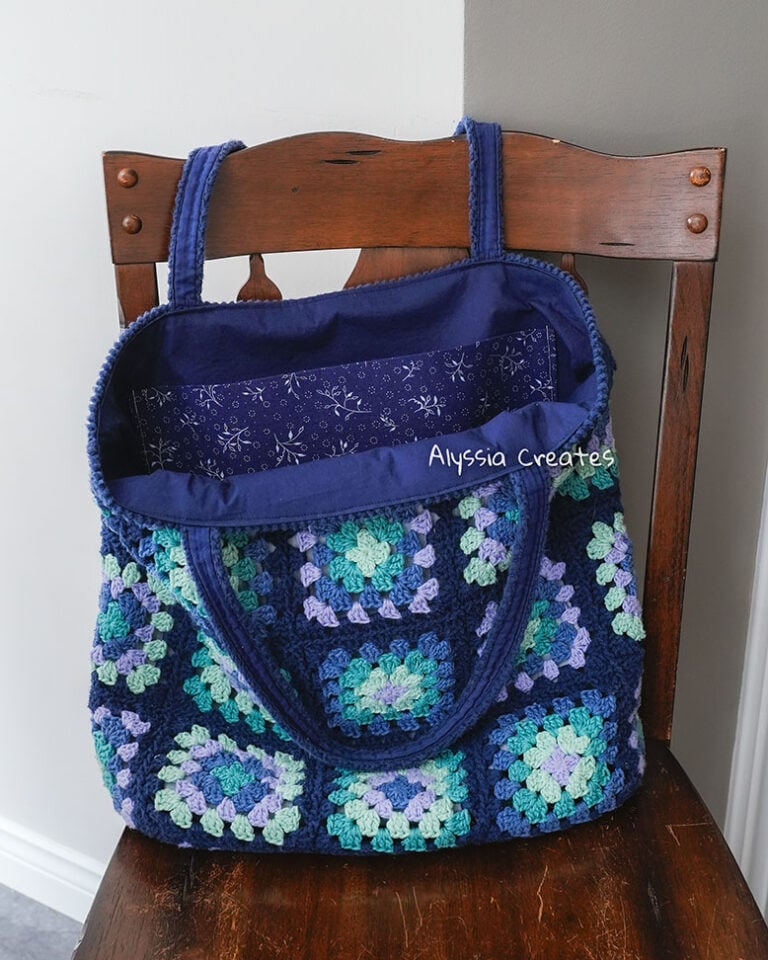
For the purposes to this demonstration, I am creating a pocket for a crochet bag lining. I will also be adding interfacing to my pocket to add more structure.
Sewing Machine Settings + Hand Sewing
Sewing Machine:
- I use the straight stitch setting on my sewing machine with a stitch length and tension of 3 for creating and attaching the pocket. You may need to adjust these settings depending on the materials used to for your sewing project.
Hand sewing
- If hand sewing (recommended for those with little to no sewing experience), use a running stitch or back stitch.
Creating a Pocket
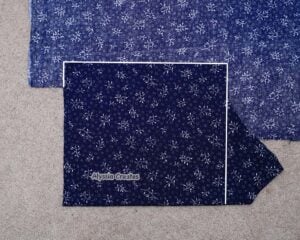
Step 1:
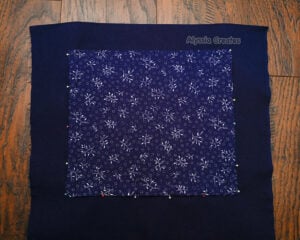
Fold from bottom of fabric upwards to the height of what you’d like your pocket to be. Pocket size can vary depending on preference. Keep in mind to leave about a 1/2″ of a seam allowance around the sides and top of fabric. The folded bottom will not need a seam allowance. Tip: I like to use my phone as a reference point for a smaller pocket and then will use a book, tablet or laptop for a bigger pocket. Once you have decided the size that you would like, trace your pocket (still keeping fabric folded).
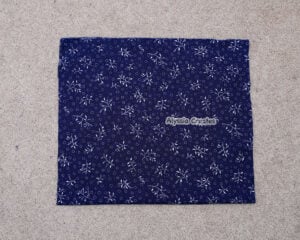
Step 2:
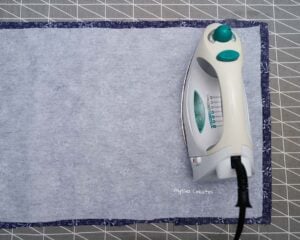
Cut fabric out while it’s still folded (so there are 2 layers of fabric with it folded). Iron fabric.
Note: It’s at this point where I would add interfacing to my pocket (open your pocket up to lay flat to do so). To learn how to add interfacing check out this post: How to Apply Iron-On Fusible Interfacing to Fabric
If you do not want to add interfacing, continue to next steps.
Step 3:
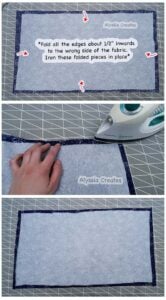
With pocket piece open (right side facing down and wrong side facing up), fold the edges all the way around about 1/2″ inwards to the wrong side of the fabric. Iron these folded pieces in place.
Step 4:
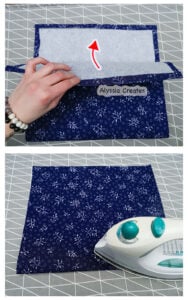
Fold fabric back in half with wrong sides facing inwards and right side outwards. Iron at fold to keep pocket piece in place.
Note: the pocket fabric will remain folded once added to your project- this ensures that both the outside and inside of your pocket has the right side of the fabric showing.
Attaching Pocket
Note: I am attaching my pocket into a lining for a crochet bag. If you are also attaching into a bag liner and are coming from my “How to Sew a Fabric Lining for a Crochet Bag” post, make sure to place pocket high enough (above the middle of the lining when lining is open) so that the bottom of your pocket doesn’t end up sitting on the base of your bag (if your bag has a base)!
Step 1:
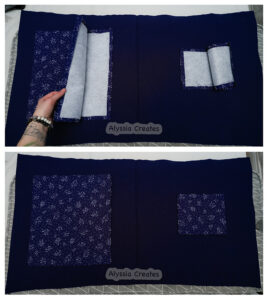
Place the pocket where desired on your project. Make sure the nice folded edge of the pocket is towards the top of the your work (the side that opens should be facing downwards as this will be sewn shut to your work).
Note: If you are working on the bag lining from my “How to Sew a Fabric Lining for a Crochet Bag” post, place pocket on the inside of the lining above the middle fold line. Make sure the folded edge of the pocket is towards the top of the lining. If your bag has a base, make sure to place pocket high enough (above the middle of the lining when lining is open) so that the bottom of your pocket doesn’t end up sitting on the base of your bag.
Step 2:
Pin the sides and bottom of your pocket into place, keeping the top of pocket unattached.
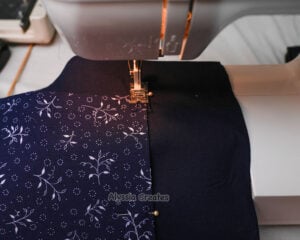
Step 3:
Sew following the pins to attach the 3 sides of your pocket to your work (still keeping the top of pocket unattached).
And that’s it!
All Done!
If you are following along with my how to line a crochet bag post and you are reading this post to add a pocket to your lining, click here to return to that post!
Like what you learned? Pin for later!