This post may contain affiliate links. Should you make a purchase through one of these links, I may earn a small commission that supports me to keep making new content at no additional cost to you. For more info, please visit the Privacy Policy page.
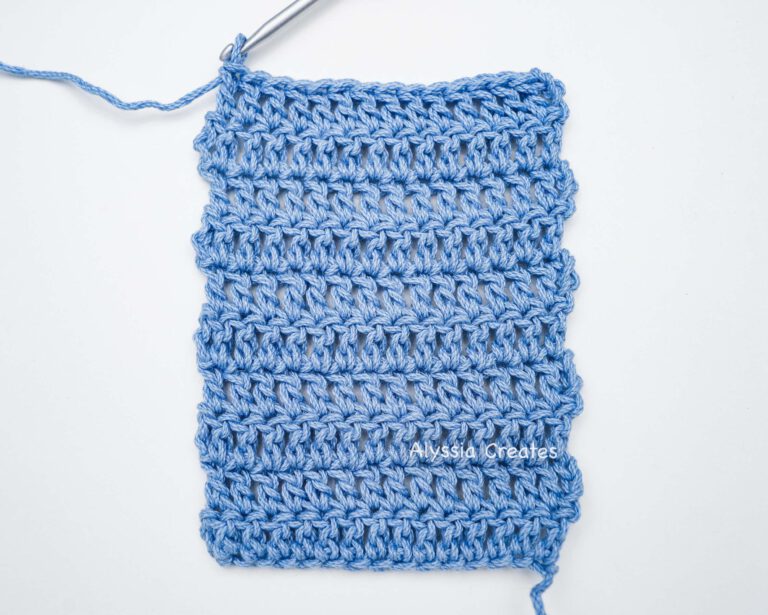
A slip stitch sits the shortest out of all the crochet stitches and is used in most patterns either to join in a round, as a decorative element to add details on the surface of your project or to allow you to move to a different part of your work without adding any additional height. You can crochet rows of slip stitches, however it would take a while and would also be quite dense – but sometimes this may have its purpose!
Supply List:
Yarn – If a beginner, I recommend starting with an Acrylic Medium Weight Level 4 Yarn
Hook:
- H / 5.00 mm, I / 5.50 mm, or K / 6.00 mm hook (depending on the suggested hook size on the label)
Some other useful tools:
- Tapestry needle (to weave in ends)
- stitch markers
- Tape measure
- Scissors
Note: For the sake of this demonstration to ensure the stitches are defined and can easily be seen in my photographs, I will be using Lion Brand 24/7 Cotton yarn. This is a medium weight cotton yarn that recommends a 4.00 mm crochet hook. As a beginner, I would not suggest starting with cotton yarn because it’s much stiffer and harder to work with especially when you are just starting out. I recommend starting with an acrylic yarn.
Stitches Used/Terminology and Their Abbreviations:
Note: The following is written in US crochet terms.
- Chain (Ch)
- Slip Stitch (sl st)
- Double Crochet (dc)
- Yarn over (yo)
- Working yarn = the strand that is still connected to the yarn ball/skein
- Yarn end/tail = the end of the yarn
Notes:
- This demonstration is from a right handed crochet perspective and uses US terms.
- Photo steps with breakdowns are included below text instructions for those who are more visual learners.
How to Slip Stitch
A slip stitch is basically like a chain stitch but it goes through the surface of a stitch within your work.
To slip stitch all you need to do is:
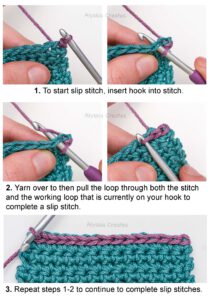
- Insert hook into stitch.
- Then, yarn over to pull the loop through both the stitch and the working loop that is currently on your hook and voila, a slip stitch has been made!
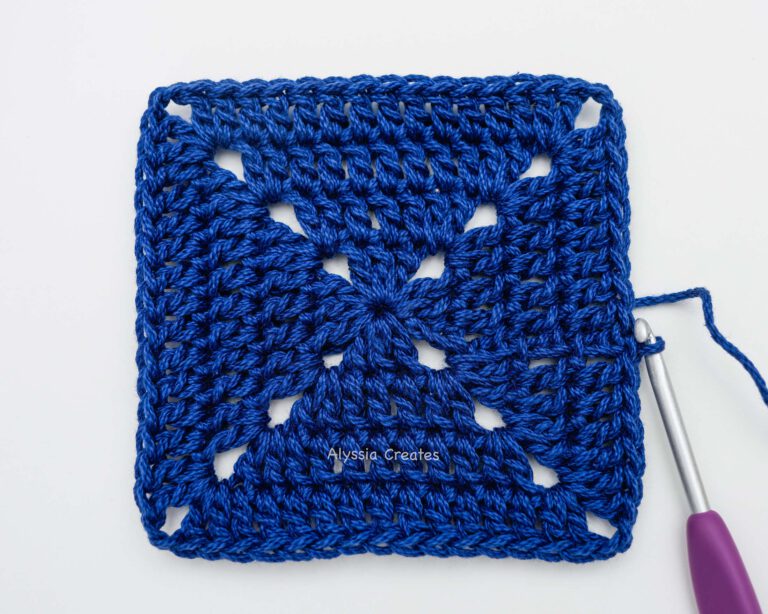
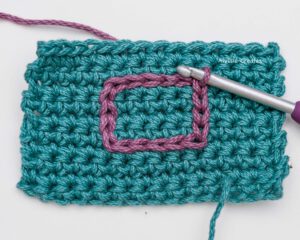
How to Slip Stitch on the Surface of Work
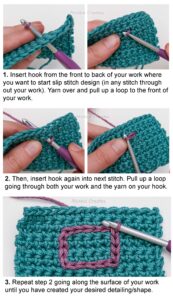
- Insert hook from the front to back of your work where you want to start your slip stitch design (in any stitch through out your work).
- Yarn over and pull up a loop to the front of your work (holding yarn tail at back until secure)
- Then, insert hook again into next stitch. Pull up a loop going through both your work and the yarn on your hook to create a slip stitch.
- Repeat going along the surface of your work until you have created your desired detailing/shape. You can work your slip stitches into any direction – going across rows, down/up rows – get creative! Play around with different shapes.
Once you are ready to fasten off:
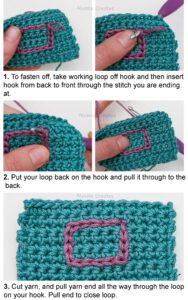
- Take working loop off hook and then insert hook from back to front through the stitch you are ending at.
- Put your loop back on the hook and pull it through to the back.
- Cut yarn, and pull yarn end all the way through the loop on your hook. Pull end to close loop and weave in your end.
How to Slip Stitch to Join in the Round
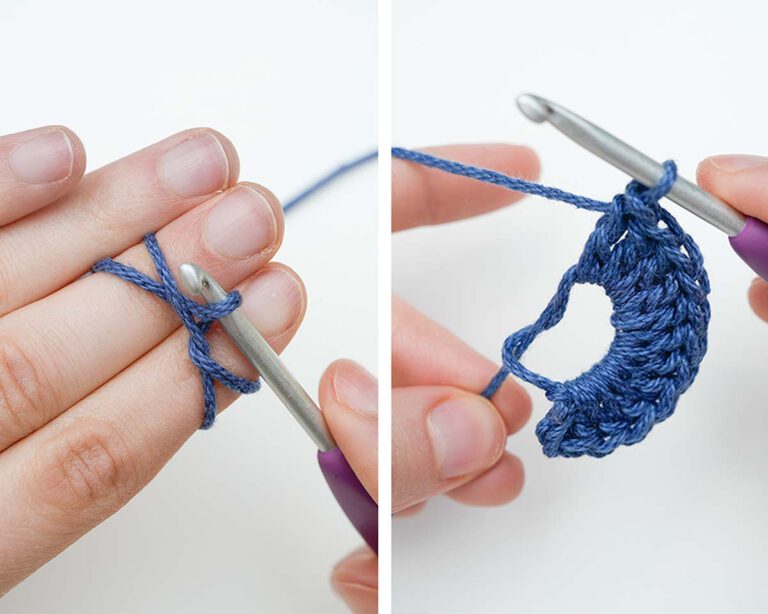
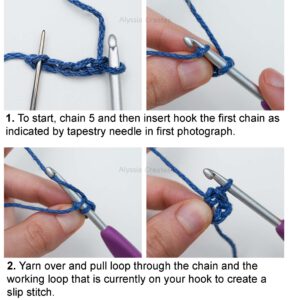
- Chain 5.
- Then working into the first chain that you made (5th chain from hook), insert hook.
- Yarn over to pull the loop through both the chain and the working loop that is currently on your hook to create a slip stitch. A circle has now been made!
Using a slip stitch to join in the round:
For the sake of this demonstration, after you have connected your circle:
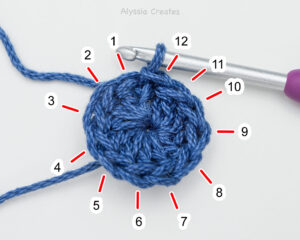
- Chain 3 (this will count as your first double crochet).
- Work 11 double crochet into the circle for a total of 12 double crochets. (Tip: Work your stitches over the yarn end so that once your first round is complete, you can pull the tail to close the circle).
- To slip stitch to join, insert hook into the 3rd chain of that first stitch that counted as a double crochet.
- Yarn over, pull loop through this stitch and through the loop on your hook to complete a slip stitch join.